How to Setup FileMaker Pro
Welcome to the FileMaker setup guide! Throughout this process, we will install the FileMaker software onto your device, setup the Prime Home Solutions user license, and login to your new Prime CRM account.
Don't worry if this sounds like a daunting task! This guide will show you how to do each of the aforementioned tasks step-by-step.
If you run into any issues during this guide, please contact it@primehomesolutions.com and you will receive help promptly!
Step 1 - Installing FileMaker on your device
We will start by downloading FileMaker from the FileMaker website. To do this, please visit this url: https://accounts.filemaker.com/software/esd/0e1bb49407a7674ce09729d860d36ebb.
This link contains the FileMaker license purchased by Prime Home Solutions. You can ignore most of it. Scroll down until you see Claris FileMaker Pro 2023.
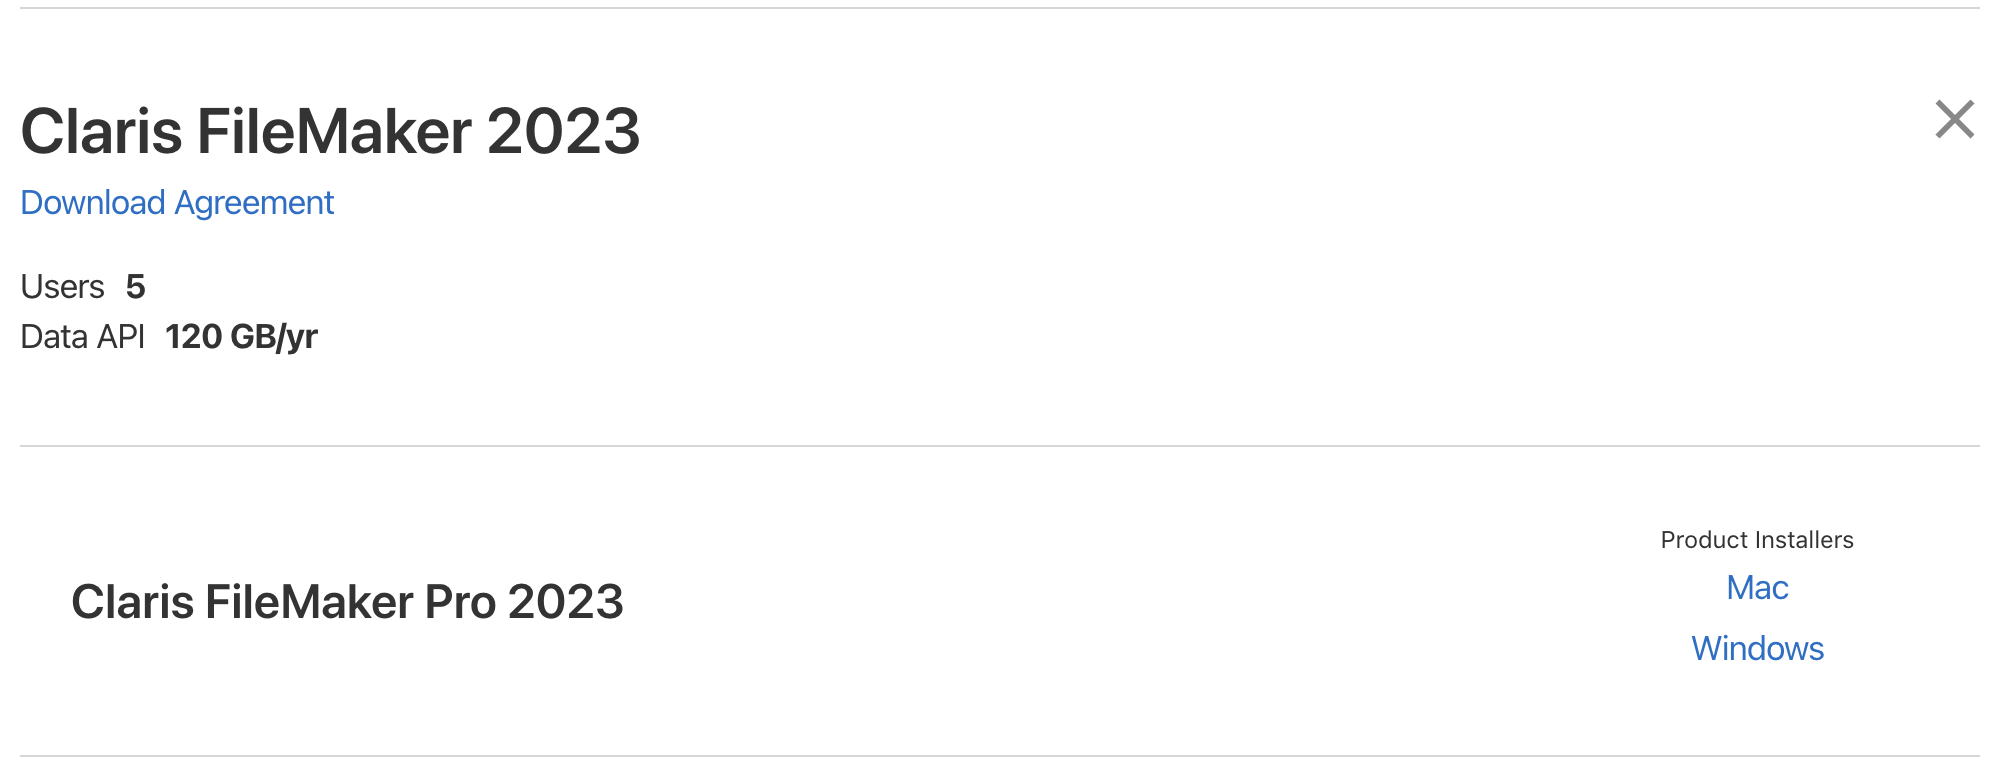
Click on the download link that corresponds to the operating system you use. After the file finishes downloading, we can proceed with the installation. Head over to your downloads folder and find the installer we just downloaded.
The example below is on a computer running Windows 11. The file we downloaded is called fmp_<version>_x64, double-click on it to open the installer.
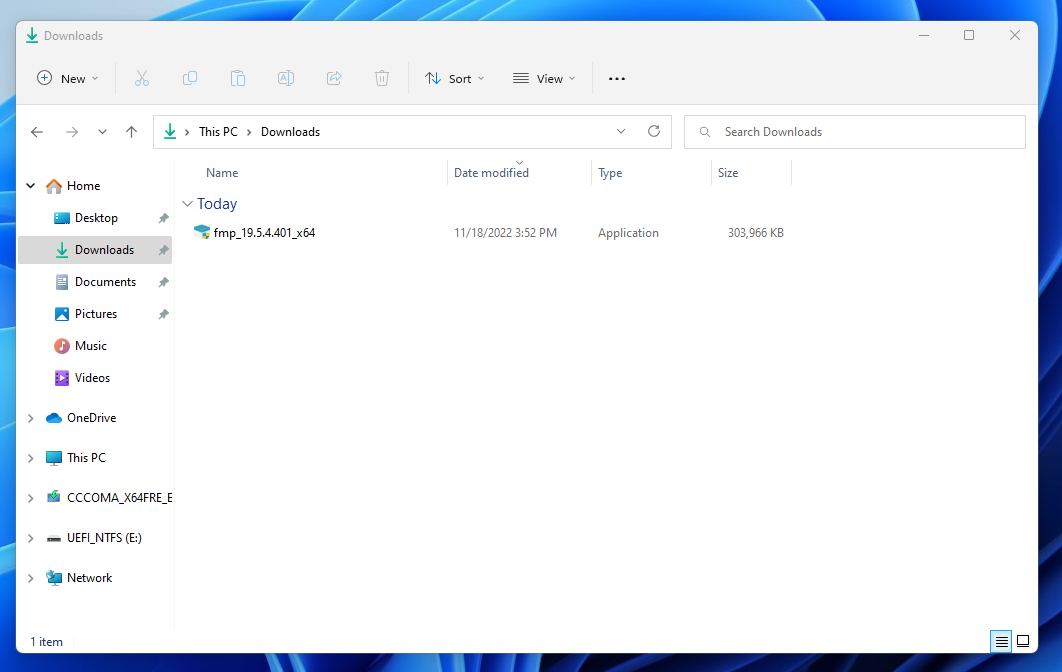
Windows Users: If a pop-up window comes up asking if you would like to make changes to your device, click "Yes".
After you open the installer, continue clicking Next until you reach the part pictured below:
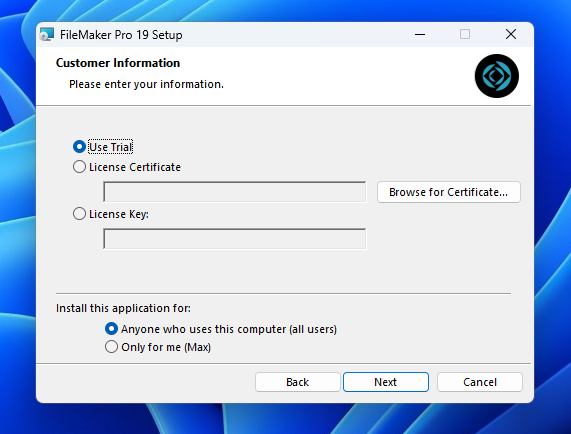
Do not click Next at this point! We first need to install the license before proceeding. Please continue to Step 2 for details on how to install the License Certificate.
Step 2 - Configuring the License Certificate
We're almost there! All thats left of the FileMaker installation is to configure the license certificate. First, we need to download the license certificate from the website we visited earlier: https://accounts.filemaker.com/software/esd/0e1bb49407a7674ce09729d860d36ebb
Scroll through the page until you find the License Certificate download section:
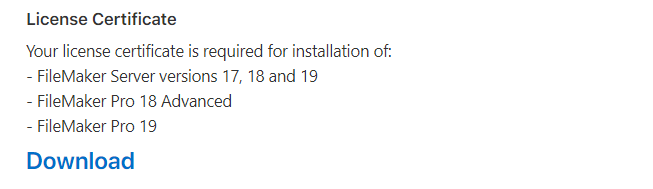
Click the Download button to download the license.
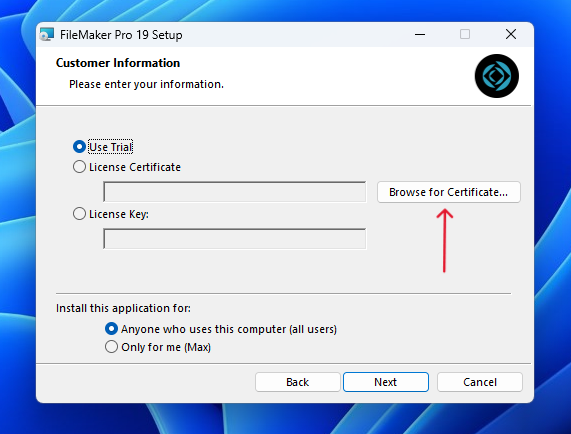
After the license finishes downloading, head back over to the FileMaker installer. At this point, we need to help the installer find the certificate. Click the Browse for Certificate button to open up your file explorer as pictured below:
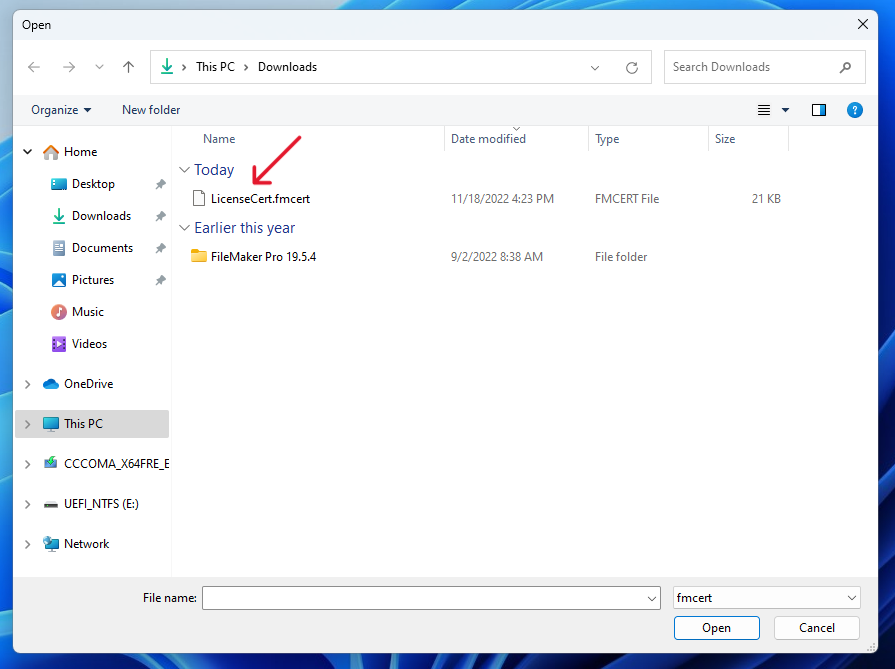
After clicking the Browse for Certificate button the file explorer window will pop-up. Select the file named LicenseCert.fmcert and click Open in the bottom right.
At this point the license certificate should be installed! You may continue to click Next through the installer until you get to the end.
There is a point in the install when it asks if you would like to do a Complete or Custom install. Choose the Complete install option.
Windows Users: After the FileMaker install finishes, you will be asked to install Bonjour. Continue clicking Next through the Bonjour installer until it is complete.
Step 3 - Connecting to the Prime CRM
After you have installed FileMaker, its time to connect to the Prime CRM! There are a few things we need to do before we can login.
If your installation went properly, there should be an icon on your desktop named Filemaker Pro. Double-click it to open it. You should be greeted with the following screen:
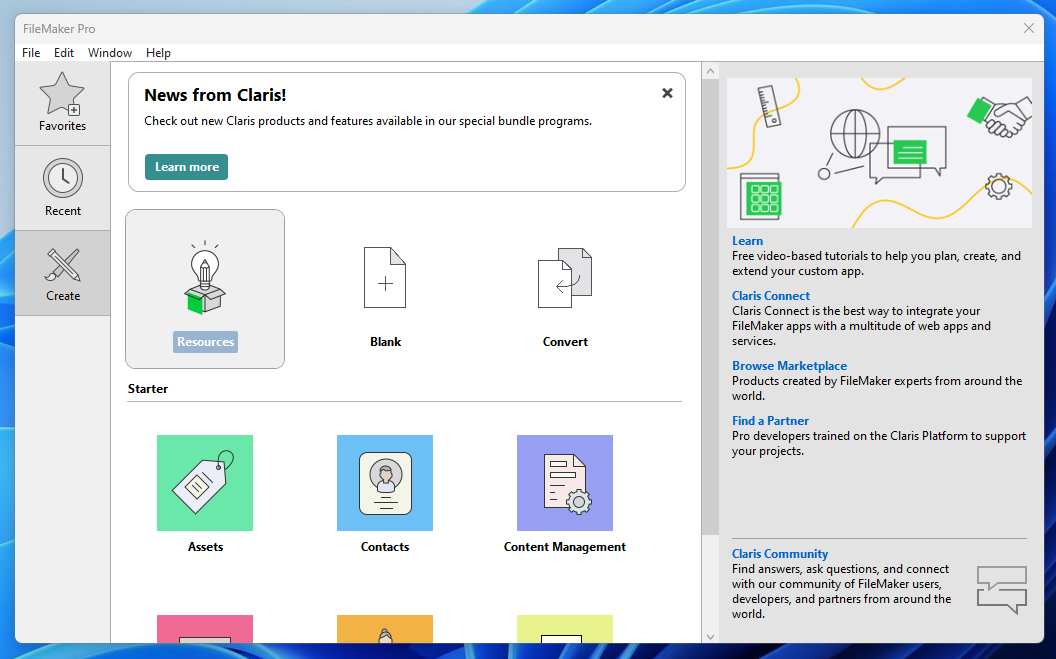
Click on the Favorites tab. After navigating to the Favorites tab your screen should look look something like this:
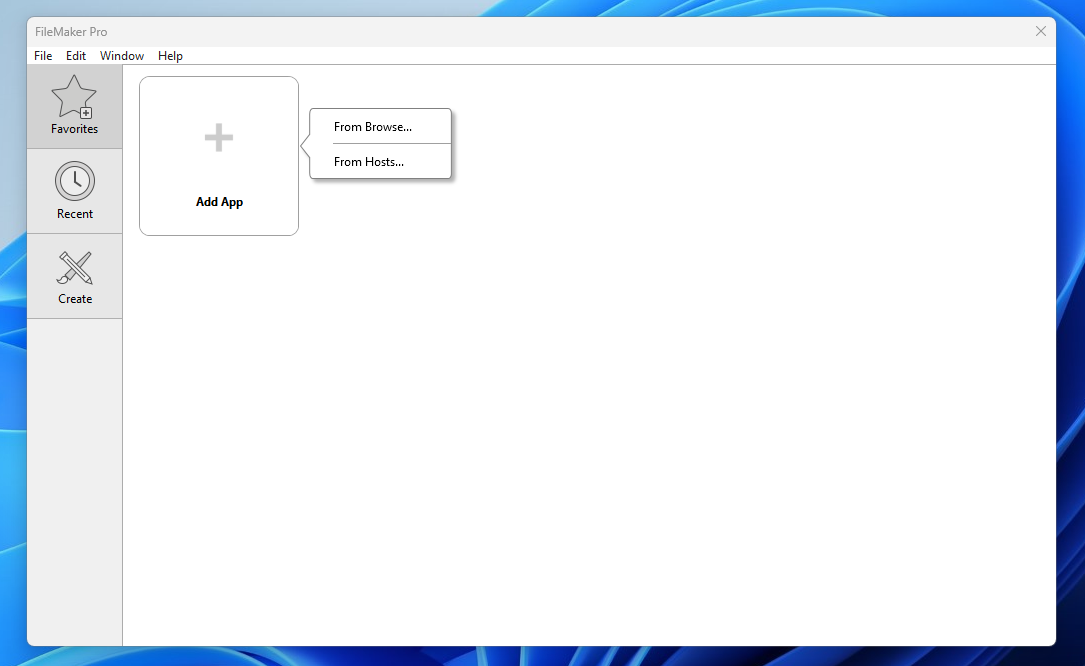
Click on the From Hosts... button. This will open up the hosts window where we can add the Prime CRM as one of our favorites.
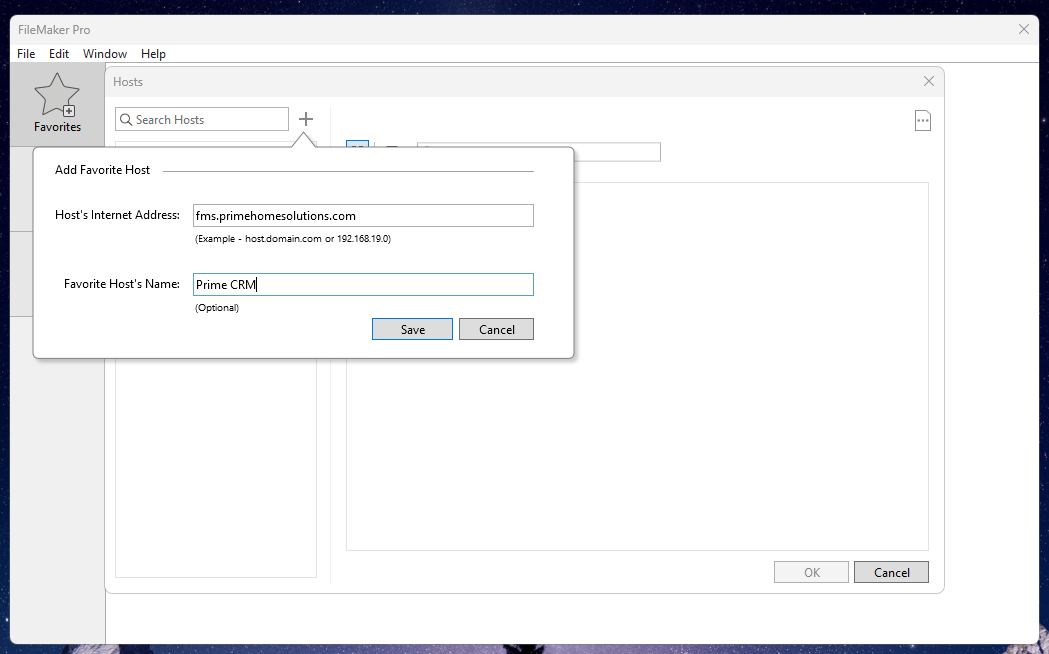
Next, click on the + icon to add a new host then type in fms.primehomesolutions.com as the Host's Internet Address and choose a name (this can be anything).
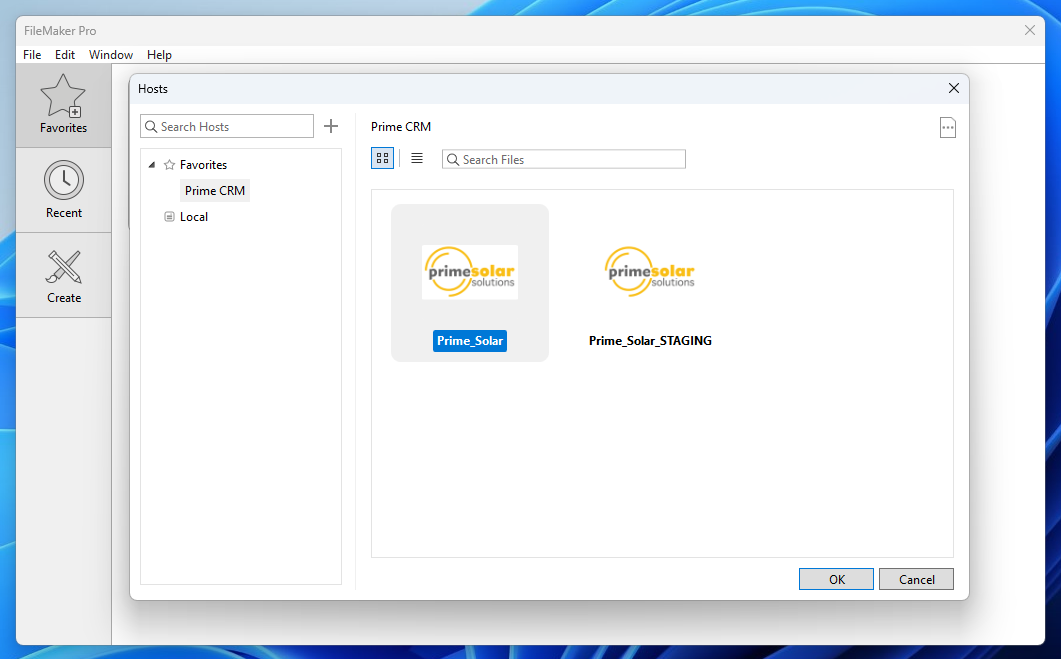
Lastly, select Prime_Solar then press OK.
Step 4 - Logging into the Prime CRM
Now that you have connected to the Prime CRM, you're ready to log in to your new account! Double click on the Prime_Solar icon to begin logging in.
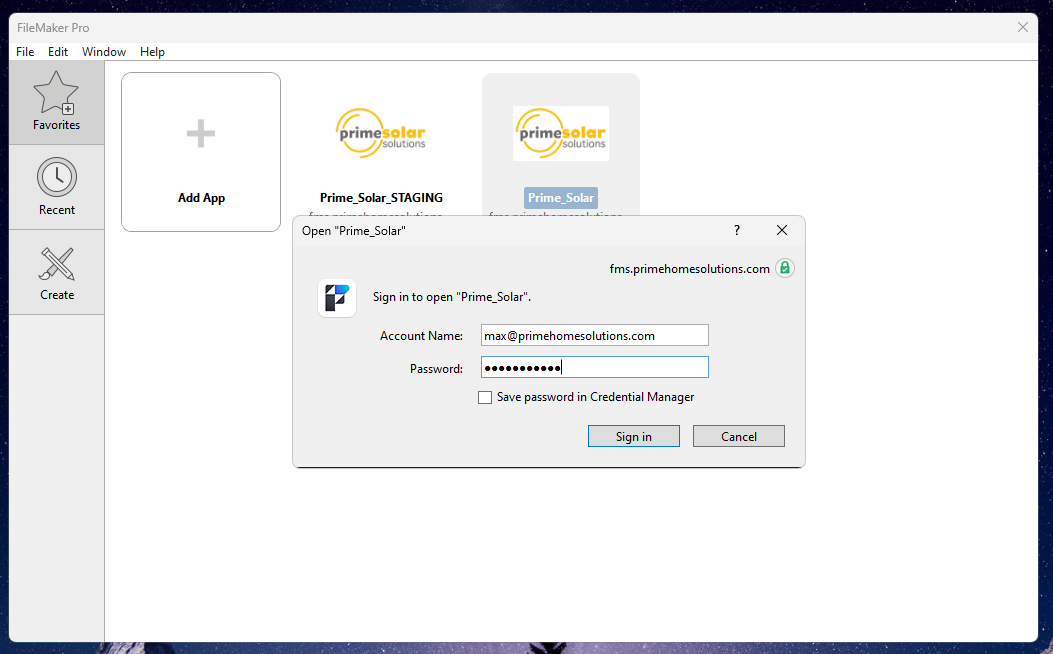
Enter your FileMaker account credentials and you're good to go!
If you experienced any issues during this process, please contact dev@primehomesolutions.com.