Re-key the SSL Certificate
This guide is deprecated. Please refer to the FileMaker CRM - SSL Certificate guide for the most up-to-date instructions.
This guide will show you how to re-key the SSL certificate for the FileMaker CRM. This process typically takes around 30 minutes to complete.
This process should not be performed during working hours. FileMaker Server must be restarted in order to install the new certificate. This will cause the FileMaker CRM to be unavailable for a few minutes.
Step 1 - Generate a new CSR
To begin, we must generate a new CSR (Certificate Signing Request). A certificate signing request is a message sent from an applicant to a certificate authority in order to apply for a digital identity certificate. The CSR contains information identifying the applicant (such as a domain name) and the public key that will be included in the certificate.
To generate a new CSR, open up a Powershell window with Administrative privileges and paste the following command into the window:
fmsadmin certificate create crm.primesolarsolutions.com --keyfilepass <some-secure-password>
Make sure to replace <some-secure-password> with a secure password. This password will be used to encrypt the private key that is generated. You will need this password when you install the new certificate on the FileMaker Server. I recommend generating/storing this password using Keeper.
After pasting this this command, you will be prompted to login using the FileMaker Server Admin account. This account can be found by logging into your Keeper account and navigating to the FileMaker Server Admin credentials under the Development Team folder.
Step 2 - Submit the CSR to the Certificate Authority
After generating the CSR, we must submit it to the CA (Certificate Authority) in order to receive a new certificate. The CA will then verify the identity of the applicant and issue a new certificate.
You can find the CSR by navigating to the following directory on the FileMaker Server:
C:\FMS\CStore
As you can see in the screenshot below, the CSR will be named serverRequest.pem.
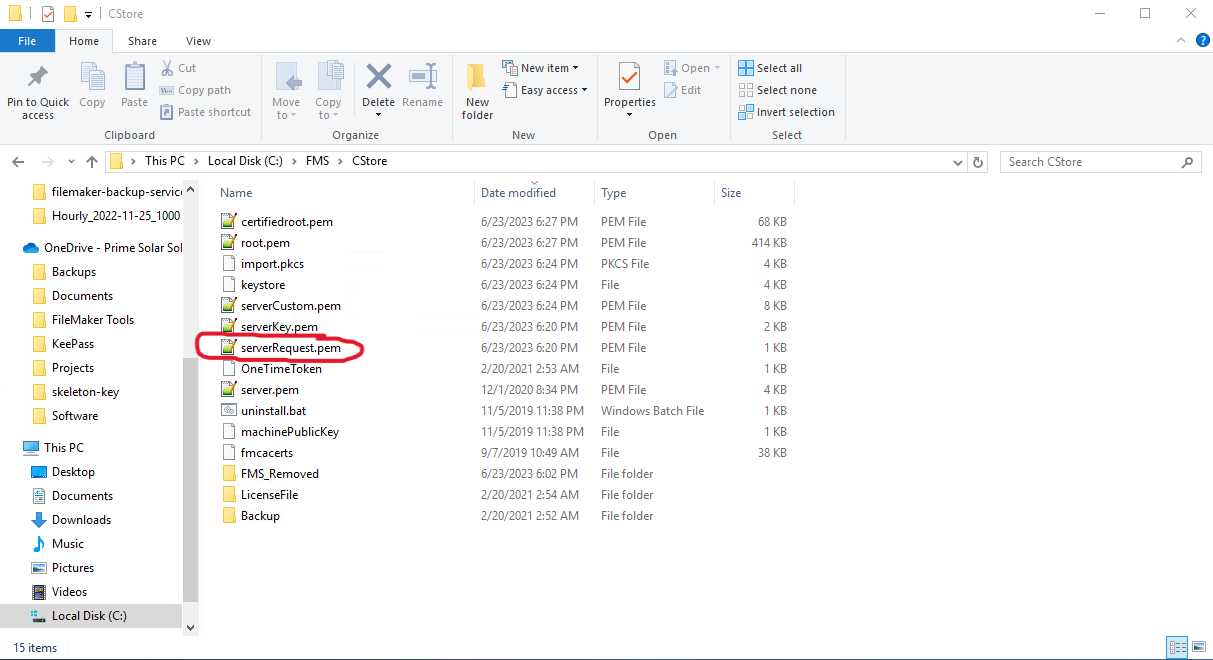
Open the serverRequest.pem file in a text editor and copy the contents of the file.
The CSR should look something like this:
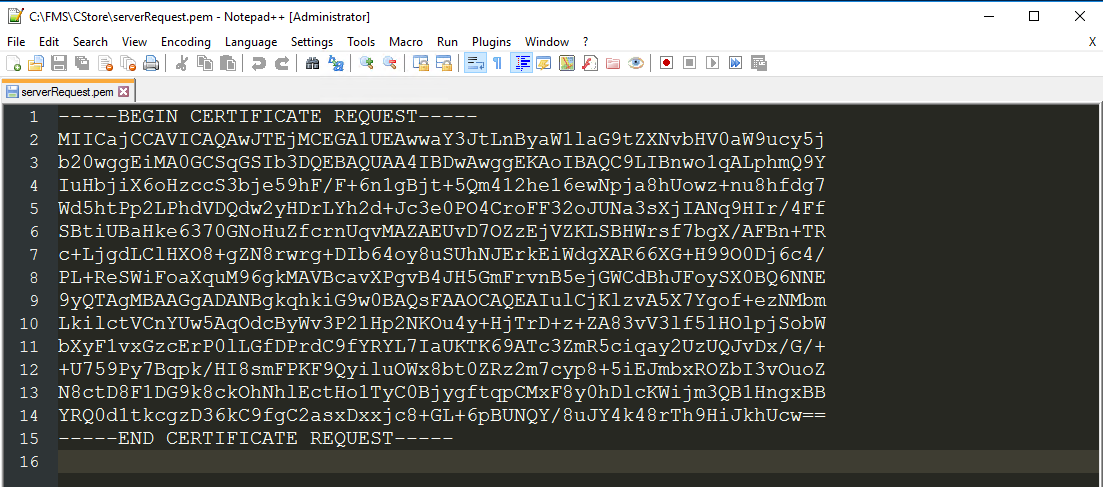
After you copy the CSR, navigate to GoDaddy and login with the credentials named GoDaddy - 138175686 TNC and Prime. You can find these credentials by logging into your Keeper account and navigating to the GoDaddy - FileMaker CRM credentials under the Development Team folder.
After logging in, navigate to the SSL Certificates page and click on the crm.primesolarsolutions.com certificate.
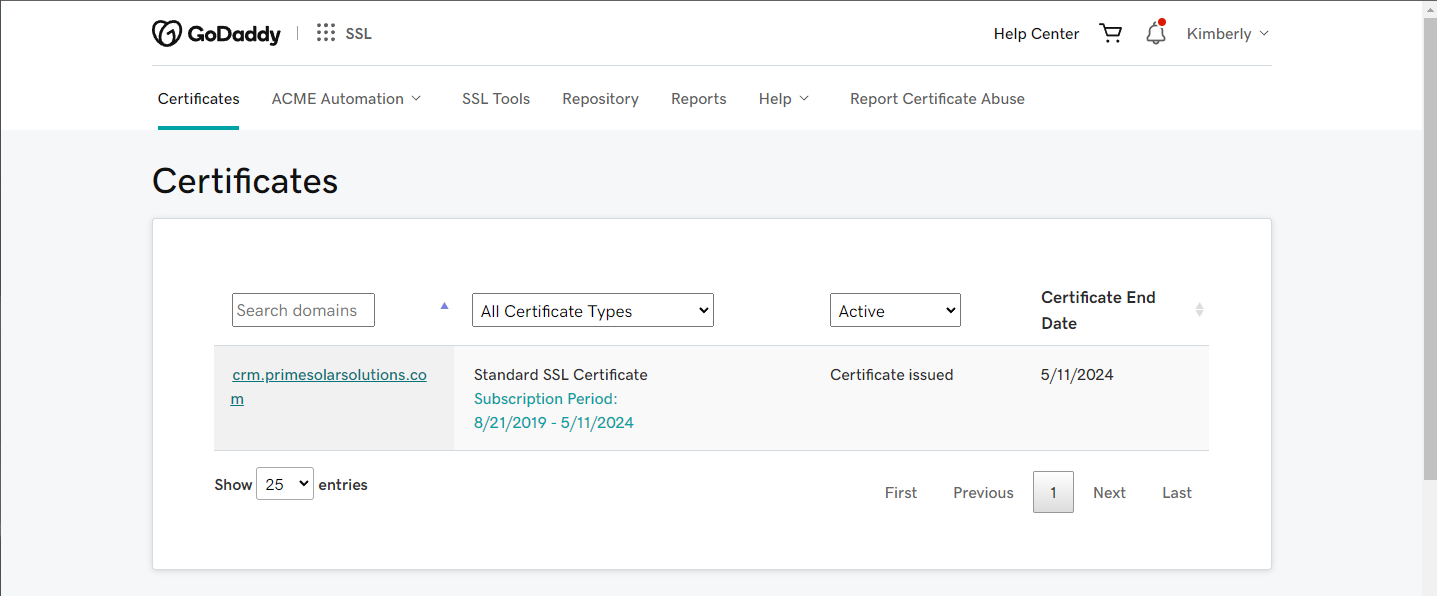
After navigating to the crm.primesolarsolutions.com certificate, locate the section called Manage Certificate and open the dropdown called Re-Key your certificate.
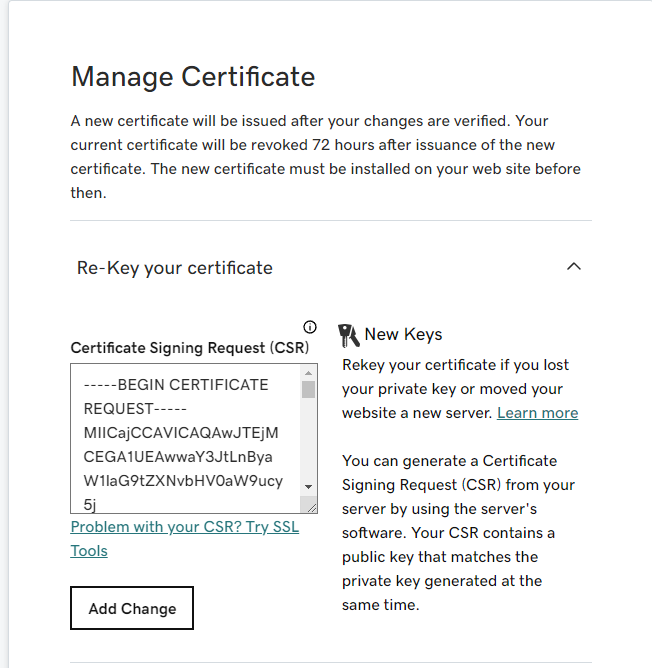
Paste your CSR into the CSR text box and click the Add Change button, then press Submit all changes.
Once the CSR request has been submitted, you will have to wait for the CA to verify the identity of the applicant. This process typically takes a few minutes to complete.
Once complete, the status of the certificate will change to Certificate Issued.
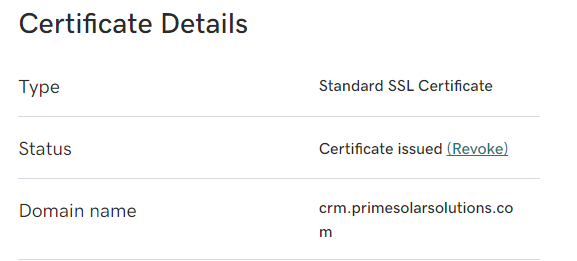
Step 3 - Install the new certificate on the FileMaker Server
Now that we have re-keyed the certificate, we must install it on the FileMaker Server.
On the same page where you uploaded the CSR, locate the section called Download Certificate. Select the Other option and click the Download Zip File button.
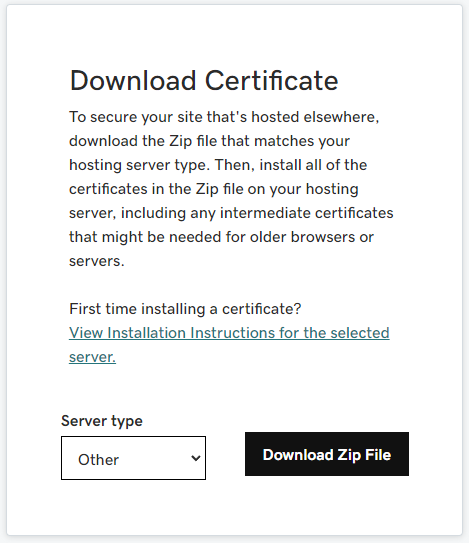
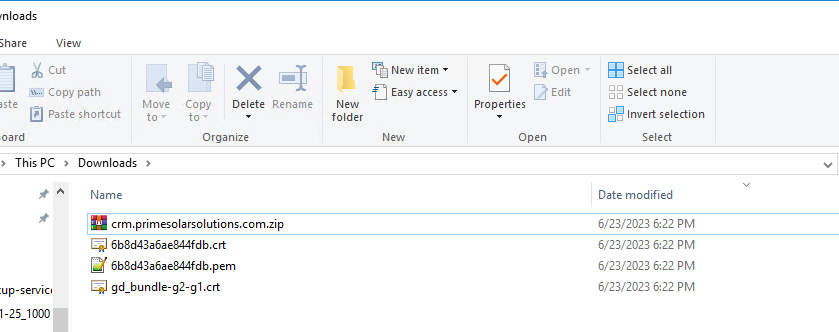
After downloading the zip file, extract the contents of the zip file. The two files that we care about are gd_bundle-g2-g1.crt and <randomly-generated>.crt.
At this point, you're ready to install the new certificate on the FileMaker Server. To do this, navigate to the Configuration tab in the FileMaker Server Admin Console and click on the SSL Certificate tab. After arriving at the SSL Certificate tab, click the Import Certificate button.
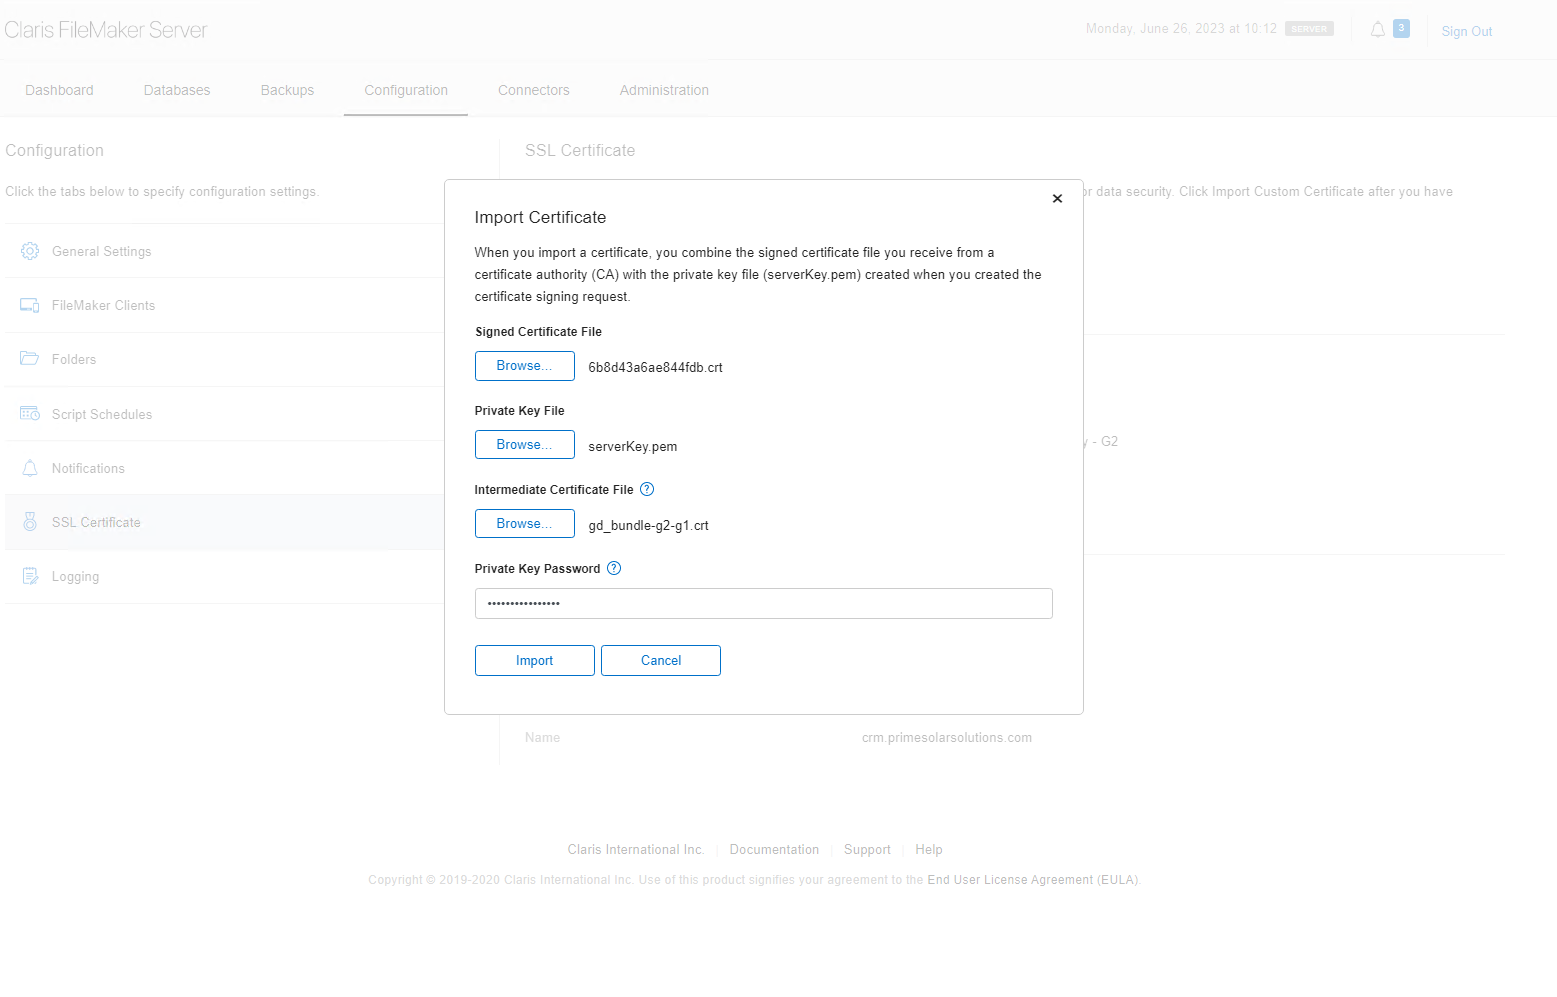
As you can see in the screenshot above, you will need to locate three files:
gd_bundle-g2-g1.crt- This is the intermediate certificate that we downloaded from GoDaddy.<randomly-generated>.crt- This is the certificate that we downloaded from GoDaddy.serverKey.pem- This is the private key that was generated when we created the CSR. You can find this by navigating to the following directory on the FileMaker Server:C:\FMS\CStore\serverKey.pem.
Lastly, you will need to enter the password that you used when you created the CSR. This is the same password that I told you to store in Keeper in Step 1.
After entering the password, click the Import Certificate button.
After importing the new certificate, you will need to restart the FileMaker Server. This will cause the FileMaker CRM to be unavailable for a few minutes.
Step 4 - Restart the FileMaker Server and verify the new certificate
To restart the FileMaker Server, open up the Windows Services window and locate the FileMaker Server service. Right click on the service and click Restart.
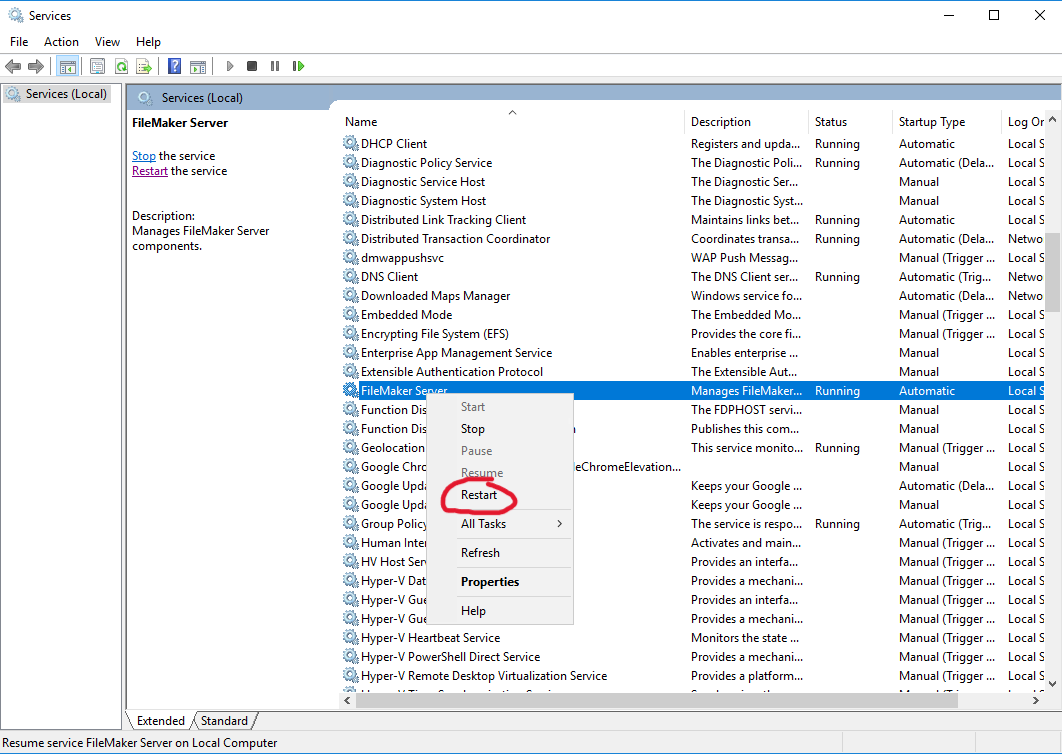
After restarting the FileMaker Server, you can verify that the new certificate is installed by navigating to the FileMaker CRM in your browser (https://crm.primesolarsolutions.com).
If you click on the lock icon in the address bar and click Certificate, you should see the following:
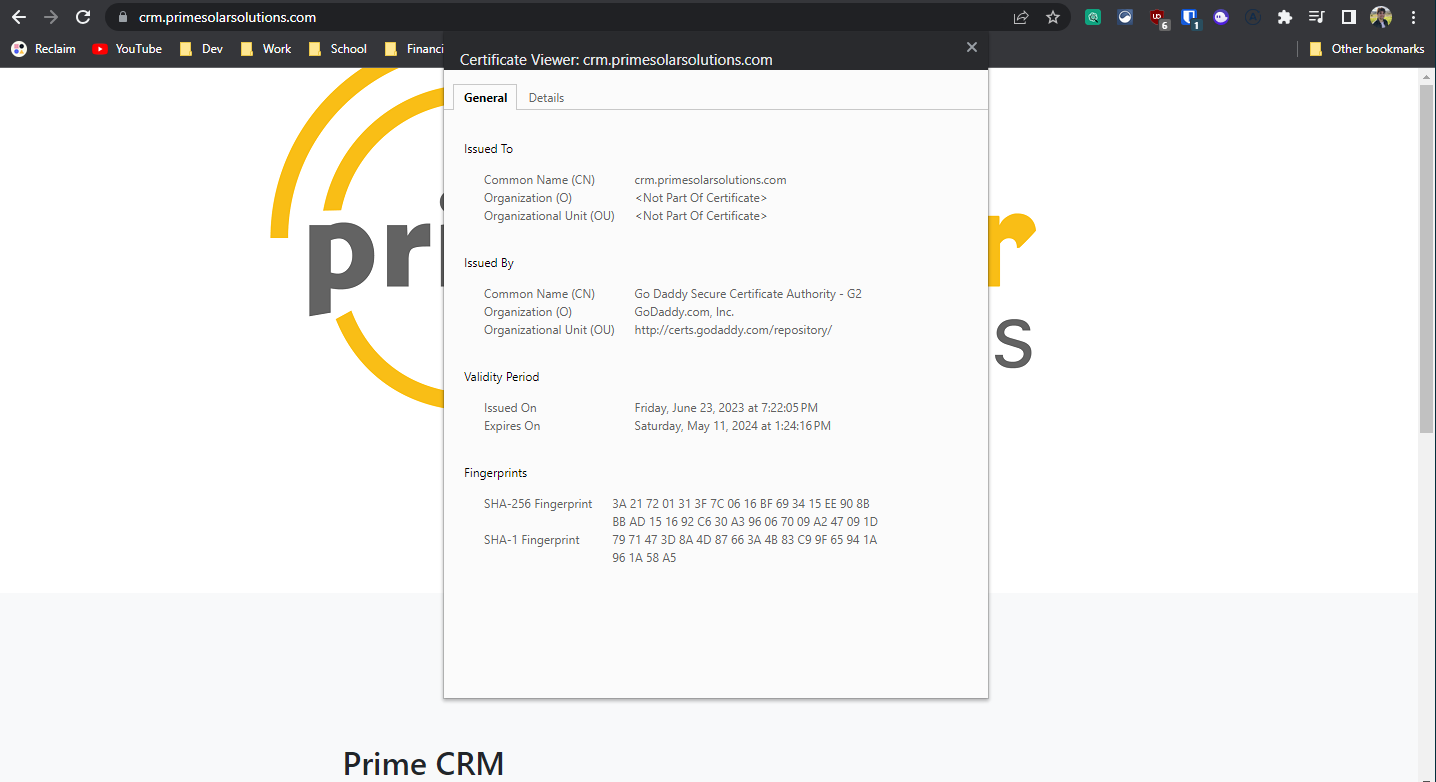
As you can see in the screenshot above, the certificate is valid and issued by GoDaddy. At this point, you have successfully re-keyed the SSL certificate for the FileMaker CRM! 🎉